If you’ve noticed your ceiling starting to sag, you might feel overwhelmed by the idea of replacing all the drywall. The good news? You don’t always have to. There are simple and effective ways to fix the issue without tearing everything down. By checking the damage carefully and using the right tools, you can make your ceiling look good and feel safe again. Here’s how to get started.
Key Takeaways
-
Look for cracks, water stains, and sagging spots to decide the best way to fix your ceiling.
-
Use a stud finder to locate ceiling joists and fasten loose drywall with screws to stop further sagging.
-
For small dips, a ceiling brace or patching compound can help without needing full replacement.
-
If sagging is severe, you may need to add support beams for extra strength.
-
Keep your ceiling in good shape by managing moisture and ensuring proper ventilation.
Step 1: Check the Damage
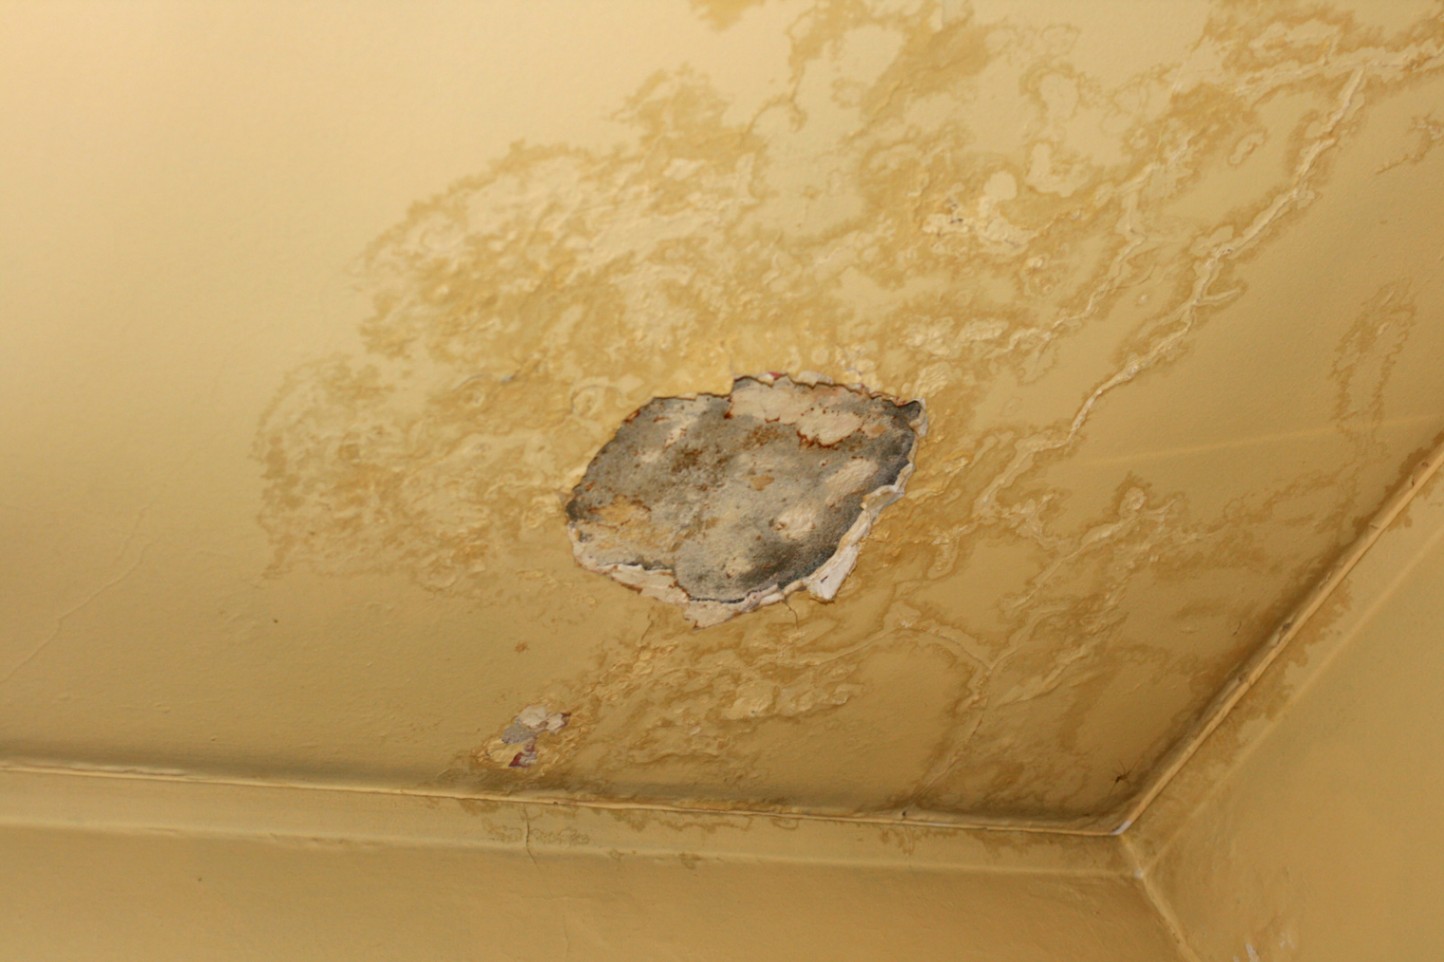
Before starting repairs, take time to figure out how bad the problem is. Look for signs like cracks, discolouration, or areas that are drooping.
Different ceiling materials—like drywall, plaster, or tiles—may show damage in different ways. Discoloured spots may mean there’s a leak, which can cause further damage. Measure how big the sagging area is. A small dip might need only minor fixes, while a larger sag may point to deeper issues. Also, check for mould or mildew, especially in damp areas like bathrooms or kitchens.
Step 2: Get the Right Tools and Materials
Having the proper tools makes the job easier and more effective. Here’s what you’ll need:
-
Drywall adhesive – to stick the drywall back in place
-
Ceiling support system – like a brace or prop to hold things up while working
-
Utility knife – for trimming damaged areas
-
Drywall saw – for cutting into problem spots
-
Drill and screws – to secure the drywall to joists or supports
-
Level – to make sure everything is even
-
Tape measure – for accurate measurements
With these tools, you’re all set to start your ceiling repair.
Step 3: Repair the Ceiling
First, find out what caused the sagging—common reasons include moisture, poor support, or simply ageing materials.
Use a stud finder to locate the ceiling joists, then tighten loose drywall with screws. For smaller dips, apply a brace or use patching compound to smooth things out.
If the damage is more serious, you might need to install new support beams to hold the ceiling in place. After your repairs are done, let everything dry completely. Then you can repaint or add texture so the fixed area matches the rest of the ceiling.
Step 4: Prevent Sagging in the Future
While fixing a sagging ceiling is helpful, preventing it is even better.
Check your ceiling regularly for early signs of trouble. Moisture is a big cause of sagging, so fix leaks quickly—whether from plumbing or the roof.
Make sure your home is well-ventilated, and consider using a dehumidifier in damp areas. Also, inspect attic insulation, as large changes in temperature can cause materials to shift and sag over time.
When to Call a Professional
If the ceiling has large cracks or the sagging is serious, don’t try to handle it alone. These could be signs of deeper structural issues that need expert help.
Fixing things the wrong way can lead to bigger problems and more costly repairs later on. A professional will have the right tools and knowledge to handle the job properly and safely. They’ll also be able to spot hidden problems that you might not notice.
In the long run, hiring a pro can save you both time and money—and give you peace of mind.
Frequently Asked Questions
Can I fix a sagging ceiling myself?
Yes, if the problem is minor and you have basic DIY skills. With the right tools and instructions, you can fix it on your own.
How long will the repair last?
If you deal with moisture issues and keep an eye on your ceiling, the repair should last several years. Staying on top of maintenance helps prevent sagging from returning.
What usually causes ceilings to sag?
Common causes include moisture, poor support, too much weight, and old materials. It’s important to find the root cause before repairing it.
Will fixing a sagging ceiling improve my home’s value?
Yes! A well-maintained home makes a good impression. Fixing a sagging ceiling can boost your property’s appearance and worth.
Can I paint over the repaired area right away?
No, let everything dry fully first. Then, use the right primer and make sure the surface is smooth before painting.
Conclusion
Fixing a sagging ceiling doesn’t have to be stressful. With the right tools and a little time, you can make it look like new—without replacing all the drywall. Regular checks and moisture control can help you avoid this problem in the future. And if things seem too tricky, don’t hesitate to call in a professional. A safe, stable ceiling keeps your home looking great and feeling secure.