If you’ve noticed uneven drywall joints in your home, it’s important to understand what might have gone wrong during installation. Mistakes like poor measuring or misaligned panels can leave noticeable flaws. To get a smooth finish, you’ll need to spot these issues and use the right techniques for taping and mudding. Let’s go through the steps you can take to fix these imperfections and get a result that looks clean and professional.
Key Takeaways
-
Check for poor joint alignment and make sure there’s enough support under the drywall to prevent uneven surfaces.
-
Fix installation mistakes like panels not lining up or being fastened poorly to improve the way joints look.
-
Learn proper taping and mudding techniques, using the right tape and feathering the edges for a smooth finish.
-
Look for signs of settling in your home—like cracks, sloping floors, or sticking doors—to deal with deeper problems.
-
Use essential tools like a drywall knife, joint compound, and sanding block to make repairs easier and more effective.
Understanding the Causes of Uneven Drywall Joints
If you’re dealing with uneven drywall joints, it helps to understand what’s causing them in the first place.
Poor joint alignment often comes from not having enough support under the drywall. This can cause it to sag or become misaligned. If the studs behind the wall aren’t spaced correctly or if the drywall sheets are installed badly, you’ll notice bumps and gaps.
Low-quality materials can also make things worse. Some drywall doesn’t hold its shape well and can shift over time.
Humidity and other changes in temperature can also affect how drywall sits and joins together. Knowing what’s behind the problem helps you find the right fix and avoid the same issue in future.
Common Installation Mistakes
Once you understand the causes of uneven joints, it’s easier to spot the installation mistakes that lead to them.
First off, poor measuring can cause panels to be cut too short or too long, leaving gaps or overlaps.
Not fastening the drywall securely can also lead to movement and bumpy surfaces.
You’ll want to make sure your panels line up properly. If they’re not, it’ll make the joints much more noticeable.
Also, if you don’t stagger the joints (a key drywall tip), the seams may become more visible.
And finally, if you don’t sand the joints correctly or use the wrong tools, you’ll be left with rough or uneven areas.
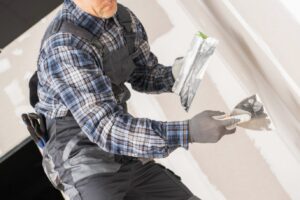
The Importance of Proper Taping and Mudding
Taping and mudding your joints properly is one of the most important parts of getting a smooth finish.
You need good taping to stop cracks from forming, and the mudding has to be done right to hide the seams and create a flat, paint-ready surface.
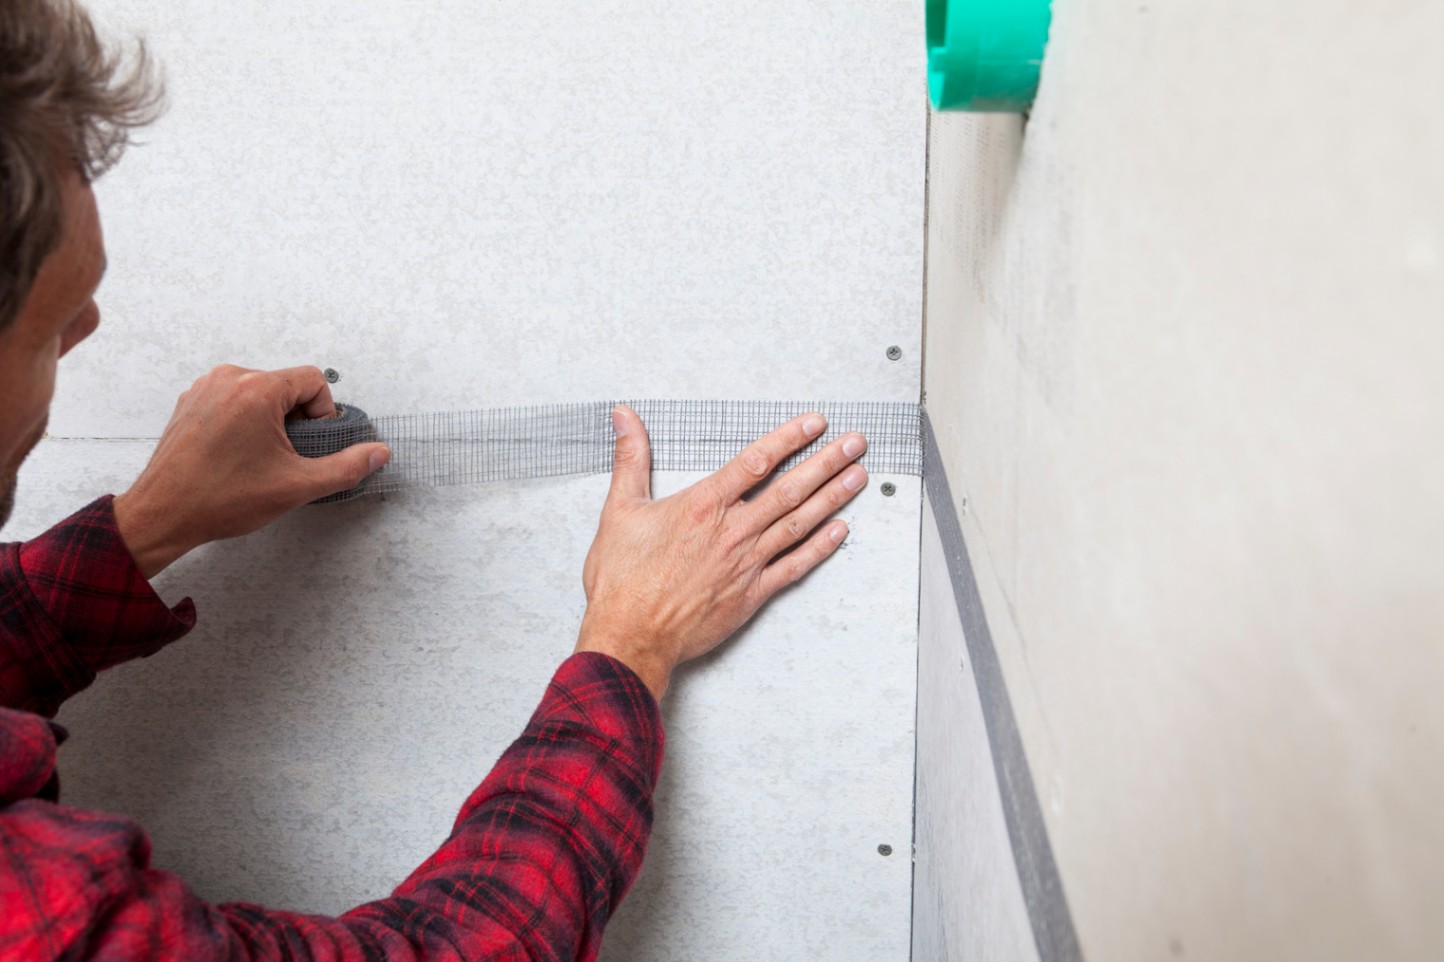
Taping Techniques Explained
Getting clean and smooth drywall joints starts with good taping and mudding.
Pick the right tape—either paper tape or mesh. For paper tape, press it into a thin layer of joint compound and smooth it out to avoid bubbles. Cover it evenly and feather the edges so it blends in with the wall.
With mesh tape, lay it down over the joint and apply compound on top, making sure it fills all the gaps.
The goal is to build a surface that feels even and is easy to sand later. Taking your time with this step really makes a difference in how the final result looks.
Mudding Application Tips
You might think taping is the most important part of the job—but mudding is just as critical.
Start by making sure the surface is clean and free from dust. Use a 10- or 12-inch knife for the first coat, spreading a thin layer over the taped joint. Feather the edges so it blends into the wall.
Let it dry completely, then give it a light sanding. For the next coats, use a wider knife and apply thinner layers to help hide any remaining seams.
Follow these simple tips and your joints will look smooth and ready for painting in no time.
Identifying Settling Issues in Your Home
How can you tell if your home might be settling?
Start by looking for cracks around doors and windows—especially foundation cracks. These may also cause doors to stick or not close properly.
Next, check if your floors are uneven or have soft spots. This can be a sign of structural shifting.
Doors and windows that no longer fit in their frames are another clue. Also, look for gaps between your ceiling and walls or between baseboards and the floor.
Spotting these early can help you take action before more serious damage happens.
Tools and Materials Needed for Repair
Before fixing your drywall joints, gather the right tools and materials.
Start with a drywall knife, measuring tape, sandpaper, and a sanding block—these help you apply, smooth, and shape the repair.
You’ll need joint compound, which comes ready-mixed or as a powder. Ready-mixed is easier for beginners, while powder gives more control.
Don’t forget drywall tape, a primer for painting later, a utility knife for trimming, and a straightedge to keep lines clean and even.
Having all of this ready before you start will make the repair process smoother and quicker.
Step-by-Step Guide to Fixing Uneven Joints
Now you’ve got your tools, here’s how to fix uneven drywall joints:
-
Mark the uneven areas so you know where to work.
-
Use a utility knife to carefully remove any damaged or bulging compound.
-
Apply a fresh layer of joint compound, feathering the edges so it blends smoothly.
-
Let it dry fully, then sand it flat.
-
If needed, add more compound and repeat the process.
-
Once the surface feels even, sand one last time.
-
Clean the area, then reapply texture to match the rest of the wall.
Done right, the repair will be barely noticeable.
Preventive Measures for Future Projects
To stop drywall problems before they start, it helps to use good measuring methods and quality materials.
Proper Measurement Techniques
Many DIYers rush through measuring—but that’s where things often go wrong.
Use reliable tools like a tape measure, laser level, or builder’s square.
Measure each wall section carefully and mark clearly. Always double-check before cutting your drywall.
When lining up pieces, use a straightedge to keep joints clean and even. For large walls, try using a chalk line to stay on track.
Quality Material Selection
Choosing the right materials makes all the difference in getting a smooth result that lasts.
For humid areas, go for moisture-resistant drywall.
Pick materials with good reviews for durability. Strong joint tape and flexible compounds are best—they help stop cracks and shifting over time.
Make sure you’re also using trusted brands and following the instructions on the packaging.
And remember: good tools and careful work matter just as much as the materials you choose.
Frequently Asked Questions
How long does it take for drywall joint repairs to dry completely?
It usually takes 24 to 48 hours, depending on the temperature and humidity. Make sure the area is well ventilated to help it dry faster.
Can I paint over uneven drywall joints straight after repair?
No—it’s best to wait until everything is fully dry and sanded. If you paint too early, the finish won’t look smooth and could peel later.
What type of paint works best on repaired drywall joints?
High-quality latex paint works well. Before painting, always use a drywall primer to help the paint stick and cover evenly.
Should I sand the joints before or after painting?
Always sand before painting. It helps smooth out the surface and avoids imperfections showing through the final coat.
How can I tell if my drywall is beyond repair?
If there are big cracks, water damage, or signs of mould, the drywall may need replacing instead of repairing. If you’re unsure, ask a professional for advice.
Conclusion
By understanding what causes uneven drywall joints and learning the right way to fix them, you can get a result that looks smooth and professional.
Tackle the common mistakes, master your taping and mudding skills, and use the proper tools. Don’t forget to check for settling issues around your home—they can affect your work too.
With a bit of care and planning, you’ll be able to avoid these problems in future projects and take pride in the quality of your repairs.