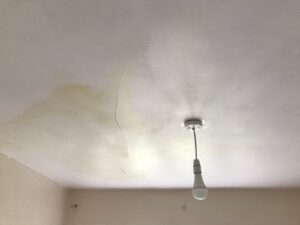
Ever notice how your ceiling textures don’t quite match? It’s a common issue caused by different application methods, environmental conditions, or even past renovations. Understanding what led to the mismatch is key to fixing it. With the right techniques and materials, you can blend those textures so they look seamless. Curious about how to check your ceiling and the steps needed for a uniform look? Let’s break it down together.
Key Takeaways
-
Texture inconsistencies often come from using different materials, methods, or working in changing conditions like humidity and temperature.
-
Renovations can make mismatched ceiling textures more obvious, so blending old and new textures carefully is important.
-
Choosing the correct technique and tools—like spray guns or trowels—is key to making textures match.
-
Practising on scrap drywall helps improve your technique and makes the final result more even.
-
A light coat of paint can tie everything together and hide minor flaws, making the ceiling look smoother overall.
Common Causes of Mismatched Ceiling Textures
If you want a ceiling that looks smooth and even, it helps to know why textures might not match in the first place.
A major issue is using different materials or techniques. For example, if you apply knockdown texture in one area and slap brush in another, you’ll notice the difference right away.
Application errors also play a big role—if your pressure or speed changes while applying the texture, it can lead to obvious patches.
Environmental conditions, like high humidity or varying temperatures, can also affect how texture dries and sticks, leading to an uneven finish.
The Impact of Renovations on Ceiling Appearance
During a renovation, the ceiling often shows texture problems more than you’d expect.
Common Renovation Challenges
Renovations can make a home look fresh again, but they can also lead to texture challenges.
One issue happens during planning, when new ceiling areas may clash with the old texture. Without careful blending, this mismatch can stand out and look messy.
Budget limits can cause some to choose a cheaper, quicker solution—like using a new texture without matching the old one—leading to an uneven result.
Existing ceiling problems, like stains or water damage, might also need extra prep before applying new texture.
Spending a bit more time and planning your ceiling updates properly will help avoid regrets and give you a more polished look in the end.
Texture Application Techniques
To get a nice, even look on your ceiling during a renovation, it’s important to know the proper texture techniques.
First, choose a texture that’s similar to what’s already there. If you’re matching knockdown texture, use a spray gun to apply joint compound, then gently flatten it with a knockdown knife.
For a stucco finish, use a trowel—it takes more practice, but gives a distinct, textured look. Make sure the compound mix isn’t too thick or too watery—consistency is key for even application.
Always practise on scrap drywall first. It helps you get the hang of your tool and technique before working on the real ceiling.
Colour and Finish Variations
When you’re matching textures, don’t forget to think about colour and finish—they’re just as important.
Colour choices affect how the room feels. Light colours make a room feel bigger and brighter, while dark ones make it feel smaller and cosier.
Also, think about finish durability. Matte finishes are good at hiding flaws but can be hard to clean. Glossy finishes look nice but might highlight bumps and imperfections.
Try to match both the texture and the shade of your ceiling so everything looks even and well-blended when you’re done.
Understanding Different Types of Ceiling Textures
Before you start working on your ceiling, it helps to know the most common texture styles—and how they’re applied.
Common Texture Types
Different ceiling textures give your home different vibes.
-
Popcorn texture is bumpy and good for hiding flaws, but some think it looks outdated.
-
Knockdown texture has a slightly flatter look that’s more modern.
-
Slap brush creates a bold, artistic pattern.
-
Smooth finishes offer a sleek, clean appearance.
-
Stucco gives a rustic feel.
-
Orange peel has soft bumps and adds subtle texture.
-
For a more luxurious look, Venetian plaster creates a smooth, polished surface.
Choose the style that fits best with your home’s look and feel.
Texture Application Techniques
Choosing a texture style is only half the job—how you apply it really matters.
Spray techniques are great for covering large areas quickly. You can use them for popcorn or knockdown textures. Make sure to control how far the sprayer is from the ceiling and how much pressure you use for even results.
Roller techniques give you more control. They’re ideal for skip trowel or smoother finishes. Changing the pressure or angle of the roller can help you get different effects.
Always test on a small section or spare board to practise your skills before starting on the whole ceiling.
Identifying Areas That Need Repair or Refinishing
Wondering how to find areas of your ceiling that need fixing? Use these simple checks.
Use different lighting—shadows help reveal uneven spots. Look for cracks, stains, or areas where the texture is peeling.
Tap the ceiling gently in different spots. If it sounds hollow, there might be damage underneath.
Also check edges and corners, where wear and tear often show up first.
Tools and Materials Needed for Blending Textures
To blend textures properly, you’ll need a few important items.
Start with the right tools—a spray gun or roller works well for applying compound. Lay down a dust sheet to keep your floors and furniture clean.
Use a ladder to reach high spots and a putty knife to smooth out any areas that need patching.
Have the right materials too—use pre-mixed texture compound or texture sprays that match what’s already on the ceiling. A sponge or fine comb can help add texture detail, and sandpaper is great for smoothing rough spots before you start.
Step-by-Step Guide to Blending Ceiling Textures
Blending textures takes a little patience and the right steps:
-
Identify the texture types already on your ceiling—knockdown, popcorn, etc.
-
Clean and repair any damage on the surface.
-
Choose your blending method—spraying, rolling, or hand-applying.
-
Feather the edges of the new texture into the old one so they blend gradually.
-
Mix the texture compound so it closely matches the existing one.
-
Work in small sections, let it dry, and check the results before continuing.
-
Once dry, paint the whole ceiling for a clean, finished look.
Tips for Achieving a Professional-Looking Finish
Want your ceiling to look like the pros did it? Follow these tips:
-
Make sure the surface is clean and flat before you start.
-
Use the right spray tools, like a hopper gun, and practise before the main job.
-
Match the thickness and pattern of the old texture as closely as possible.
-
Adjust spray pressure and distance to keep it even.
-
Once finished, use a light coat of paint to hide small flaws and tie the whole look together.
When to Consider Hiring a Professional for Ceiling Repairs
Even with the best tools and tips, sometimes ceiling repairs are better left to the pros.
If you’ve got major damage—like water stains, big cracks, or sagging—bring in an expert. They’ll assess the problem properly and recommend the right fix.
Cost is also a factor—DIY may seem cheaper, but if it goes wrong, you could end up spending more to fix it again.
Professionals also work faster and more efficiently. If time or quality is important, it might be worth hiring someone with experience to make sure your ceiling turns out perfect.
Frequently Asked Questions
Can I blend different ceiling textures without repainting the whole ceiling?
Yes, it’s possible. Focus on matching the texture closely and blending the edges. If done well, you may not need to repaint the whole thing.
How long does it take to blend ceiling textures successfully?
It usually takes a few hours, depending on the method and drying time. Be patient and don’t rush each layer.
Will blending textures affect my home’s resale value?
Yes—positively! A seamless ceiling makes the home look better maintained and more appealing to buyers.
What if I’m allergic to dust during the blending process?
Use a dust mask, seal off the area, and keep a window open or use an air purifier to reduce dust exposure.
Are there eco-friendly materials for ceiling texture blending?
Yes, you can find eco-friendly compounds made from clay or cellulose-based materials. They’re better for the environment and still give great results.
Conclusion
In the end, getting your ceiling texture to match is about more than just applying compound—it’s about understanding your space and using the right approach.
By learning the causes of mismatched textures and choosing the correct tools and techniques, you can create a smooth, unified look. Don’t be afraid to practise and take your time, and remember—a fresh coat of paint goes a long way.
If it ever feels too tricky, calling in a professional can ensure your ceiling looks flawless and finished with care.


