Hanging drywall is one of the hardest activities in new construction and home renovations. Learning the technique of hanging drywall is crucial to getting results that are on par with professionals, whether you are building a new home or remodeling an existing one. In this blog we will get into the nuances of hanging drywall skillfully in this article, giving you behind the scenes professional advice and methods to improve your abilities and remodel walls like a seasoned pro.
Now don’t go thinking you can sheet your whole home if you’ve never done so. Call us at Drywall Medic if you have a big project – you’ll thank us in the end!But if you are a DIYer in Victoria, Oak Bay or Saanich and you are doing a small job, this blog is for you. We’ll walk you through step-by-step instructions, ensuring you gain confidence in tackling those smaller drywall projects on your own. Additionally, we’ll share some invaluable drywall maintenance tips to help you keep your walls looking flawless long after the job is done. With the right approach, tools, and guidance, even DIY beginners can achieve impressive results!
Recognizing the Significance of Drywall Installation
Prior to delving into the do-it-yourself components of hanging drywall, it is critical to understand its importance in the building or remodeling process. The main surface of walls and ceilings is drywall, which offers a uniform, smooth surface for finishing touches like paint or wallpaper. In any area, soundproofing, structural integrity, and aesthetic appeal all depend on proper installation. Moreover, drywall serves as a versatile canvas, allowing homeowners and builders to customize the appearance of a space to suit their preferences. When planning the finishing stages, it’s also important to consider the pros and cons of drywall textures, as different textures can add visual interest but may require varying levels of effort to apply or repair. Properly weighing these options ensures that the final result aligns with both the functional and stylistic goals of the project. Proper installation not only ensures durability but also helps maintain energy efficiency by providing a reliable barrier against temperature fluctuations. Additionally, exploring cool drywall ideas for homes can lead to creative design solutions, such as textured finishes, built-in shelving, or even accent walls. By combining functionality with innovation, drywall can transform a space into something unique and visually appealing. Properly installed drywall not only enhances the visual appeal of a space but also contributes to energy efficiency by providing an additional layer of insulation. When tackling home improvement ideas, mastering drywall installation can open the door to a variety of projects, from creating accent walls to renovating entire rooms. With the right tools and techniques, even beginners can achieve professional-looking results.
Essential Tools and Materials
To hang drywall like an expert, you will need the right tools and materials for the job. These may include:
- Drywall panels
- Drywall screws
- Screw gun or drill
- T-square
- Utility knife
- Drywall saw
- Joint compound
- Taping knife
- Sandpaper
- Corner beads (if applicable)
Setting Up the Workspace
It is critical to get your workspace ready for success before starting the installation procedure. Make sure there is enough room for movement and efficient work by clearing the area of any trash and obstructions. Organize your tools and materials for easy access, minimizing interruptions during the installation process. Additionally, ensure proper ventilation and lighting to facilitate precision and accuracy in your work.
Measuring and Cutting Drywall
After setting up the workplace, the drywall panels need to be measured and cut to size. Carefully mark and score the drywall along the desired proportions using a T-square and utility knife. After carefully breaking the panel with a snapping action on the scoring edge, trim any leftover edges or corners with a drywall saw as necessary. Precision is key in this step to ensure accurate fits and minimal waste.
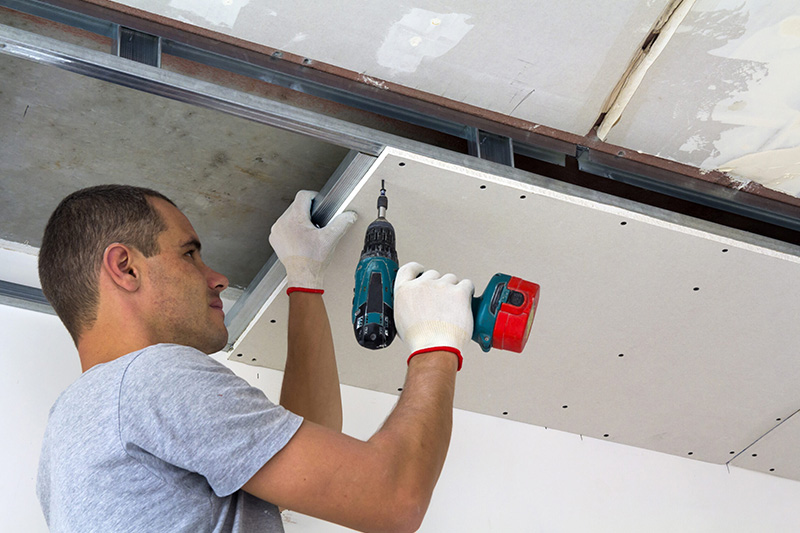
Hanging Drywall Panels
Now that the panels have been cut to size, you can start hanging them from the ceiling or wall. Make sure the first panel is level and flush with the surrounding surfaces before placing it against the wall. Attach the panel to the studs or joists using drywall screws by using a screw gun or drill. Place the screws about every 12 inches along the borders and every 16 inches in the middle. For extra strength and stability, repeat this method with every consecutive panel, staggered at the joints.
Dealing with Obstacles and Cutouts
During the installation process, you may encounter obstacles such as electrical outlets, switches, or plumbing fixtures that require cutouts in the drywall. Measure and mark the location of these obstacles on the drywall panels before cutting them out using a utility knife or drywall saw. Take care to ensure the cutouts are precise and fit snugly around the obstacles to maintain the integrity of the wall surface.
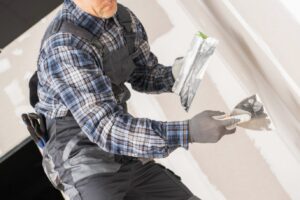
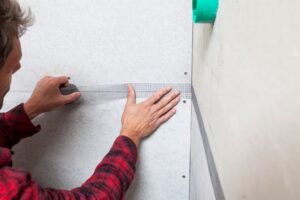
Joint Taping and Mudding
To achieve a continuous surface, after all of the drywall panels are hung, the joints need to be taped and muddied. To guarantee adherence, cover the joints with drywall tape and press it firmly into the joint compound. Spread a thin coating of joint compound over the tape using a taping knife, feathering the edges to match the surrounding drywall. Sand or apply more coats only when the compound has completely dried. Allow the first coat of joint compound to dry completely before sanding or applying subsequent coats to achieve a smooth finish. In addition to taping joints, take the time to patch small holes in drywall using a similar method—apply joint compound, smooth it out, and let it dry before sanding. Properly sealing all imperfections ensures a flawless, professional-looking surface ready for priming and painting.
Sanding and Finishing
To get a smooth, consistent finish, sand the surface once the joint compound has dried. If the drywall surface has any lumps, ridges, or flaws, use fine-grit sandpaper or a sanding sponge. Avoid oversanding as this might lead to uneven spots or harm the drywall. Before applying paint, wallpaper, or other finishes, use a clean cloth or vacuum to remove any remaining dust from the flat surface. For optimal results, consider priming the surface after cleaning to ensure an even application of your chosen finish. Incorporating these drywall finishing tips and techniques can help you achieve a professional-grade appearance. Always work in a well-lit space to spot any imperfections that might need additional attention before moving to the final step.
Final Touches and Inspection
Spend some time looking over the drywall installation to look for any flaws or areas that could need further care before moving forward with the final finishes. As you make any necessary touch-ups or repairs, make sure the entire surface is uniformly smooth. When you are happy with the outcome, you can continue to finalize your space’s makeover by painting, hanging wallpaper, or adding other details.
Hanging drywall may seem like a very challenging task – because most of the time it is, but with the right knowledge and techniques, you can achieve professional-quality results in your home improvement projects.
Note: Installing drywall on ceilings requires lifting large sheets above your head at extended periods of time and should only be performed by strong and coordinated individuals. If you are facing any difficulty then you should contact Drywall Medic for this. We are professional at our work and have a dedicated team for drywall installation. Contact details for Drywall Medic is as follows:
Victoria, BC: #136 – 2936 Amy Rd, Victoria, BC, V9B 0B2, Contact Number- 250-880-8849,
Vancouver, BC: 6894 192 St, Surrey, BC V4N 0B7, Contact Number- 604-913-4656