Popcorn ceilings have recently lost popularity because of their outdated appearance and potential health risks related to asbestos. Nonetheless, textured ceilings are still common in many homes throughout Victoria and Vancouver BC. Popcorn ceilings are prone to sustain damage from water leaks, cracks, or simple wear and tear over time.
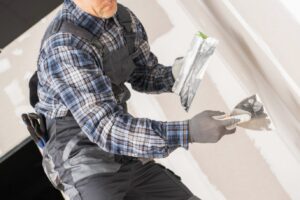
Although it may appear difficult, fixing smaller popcorn ceiling repairs can be a do-it-yourself effort if you have the necessary equipment and know how. But most of the time it’s better to get help from the professionals at Drywall Medic. Drywall Medic Victoria is the best company for these kinds of professional work and in this blog we will go through a few ways how you can properly fix damaged popcorn ceilings in your home or office.
Step 1: Safety Precautions
Safety must always come first when beginning any repairs to popcorn ceilings. In the event that your house was constructed prior to 1980, asbestos may be present in the popcorn texture. In these situations, getting it tested by Drywall Medic is essential before attempting any repairs. To further protect yourself from dust and debris, put on safety equipment including gloves, goggles, and a dust mask.
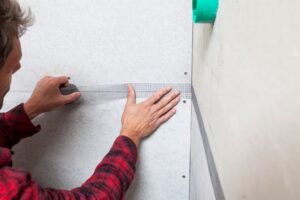
Step 2: Prepare the Area
To shield the floor from falling dust and debris, remove all furniture from the room or cover it with plastic sheeting or a drop cloth. Painter’s tape can be used to protect walls and fixtures from being damaged or covered in repair materials.
Step 3: Assess the Damage
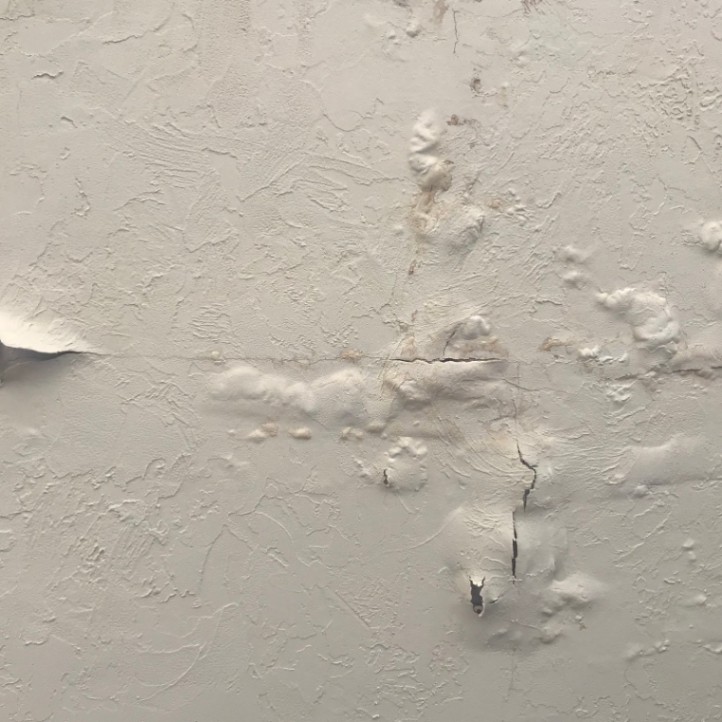
Examine the popcorn ceiling closely to determine the severity of damage. Quite often, cracks, water stains, or areas where the texture has peeled off from abrasion are common problems. The extent of the damage will determine which restoration methods you need to use.
Step 4: Repairing Cracks and Holes
A pre-mixed joint compound or spackling paste can be used for minor cracks and holes. Spread the compound uniformly over the damaged area with a putty knife after applying it. After letting it cure entirely as directed by the manufacturer, use fine-grit sandpaper to smooth it out.
Step 5: Patching Water Stains
Yellow popcorn ceiling stains from water damage can look ugly. To stop more damage, begin by fixing the source of the water leak before attempting to repair them. To stop the stain from leaking through after the area has dried, use an oil based stain-blocking primer. For best results, we recommend using Zinsser Cover Stain or the shellac product – Zinsser BIN. Sometimes you may need to apply two coats of these primers in order to completely block out the water stains. Next, apply a coat of ceiling paint that complements the surrounding area using a paint brush or roller.
Step 6: Reattaching Loose Texture
You can use a popcorn ceiling repair spray or a solution of white glue and water to restore any parts of the popcorn texture that have come loose or peeled off. Apply the mixture with a spray or dab into the loose texture’s back, then firmly push it back into place. Wipe away any extra adhesive with a fresh cloth.
Step 7: Blending the Repair
You will need to integrate the mended sections with the remaining popcorn ceiling after making the necessary repairs. Using a popcorn ceiling patching compound, which is specifically designed to mimic the texture of popcorn ceilings, is one method to achieve this. Utilising a paint roller or texture sprayer, apply the compound as directed by the manufacturer. Before painting, let it totally dry. (Keep in mind it’s very difficult to achieve the exact same texture patterns, however the skilled trades workers at Drywall Medic have the experience to get it right the first time).
Step 8: Painting the Ceiling (Optional)
Although popcorn ceilings are typically left unpainted, painting the ceiling can give it a brighter appearance and finish. You can use a thick-nap roller to apply the paint, however it often gets messy and can splatter all over your face and clothing. Make sure you use lots of paint and avoid applying excessive pressure as this may cause the texture to dislodge.
Our recommendation is to spray the ceilings with an HPLV spray machine. This makes the application contactless and reduces the mess. We also recommend using a premium oil based paint.
Step 9: Clean Up
Remove the painter’s tape, plastic and drop cloths when the repairs are finished and the paint has dried, if applicable. After vacuuming the area to get rid of any dust and dirt, move the furniture back into the room. If you are uncomfortable doing this, just give us a call at Drywall Medic and our friendly team will be more than happy to come to your location, provide you with a competitive price and get it done for you with minimal disruption to your life.
Step 10: Final Inspection
Make sure the repairs are flawless and the texture of your repaired popcorn ceiling is uniform by giving it one last inspection. Make any necessary corrections before declaring the project finished.
Remember, if you have the correct equipment, supplies, physical ability and knowledge, fixing broken popcorn ceilings can be a simple DIY project. However, keep in mind that this is over-head work and requires physical strength and stamina – and is not recommended if you have shoulder or neck issues. Additionally, take proper safety precautions, such as wearing protective gear and ensuring the area is well-ventilated, to avoid any potential health hazards. Repair cracks in popcorn ceilings carefully by cleaning the damaged area, applying a patching compound, and blending the texture to match the surrounding surface. With patience and attention to detail, you can restore your ceiling’s appearance without professional help.
These detailed instructions will help you bring back the original beauty of your ceiling and enhance the overall look of your house. Always put safety first, take your time doing any repairs, and do not be afraid to get professional assistance when necessary.
You may effectively restore your damaged popcorn ceiling and take pleasure in a modern, fresh look for your living area with a little perseverance and attention to detail. If you want to take help from the professionals in Victoria then you should consider Drywall Medic. Contact details for Drywall Medic are as follows.
- Victoria, BC: #136 – 2936 Amy Rd, Victoria, BC, V9B 0B2, Contact Number- 250-880-8849,
- Vancouver, BC: 6894 192 St, Surrey, BC V4N 0B7, Contact Number- 604-913-4656