Ah, the joys of homeownership – you invite your family and friends over for a fun evening with the cozy warmth of a crackling fireplace, a fresh coat of paint on the walls and… the unsightly eyesore of a yellow stippled ceiling as popcorn ceilings.
If you’re like many homeowners in Victoria, BC, Saanich, BC, or Langford, BC, you’ve probably found yourself staring up at those bumpy, yellowish, textured monstrosities and thinking, “There’s got to be a better way.”
Oh yes, there is a better way – Drywall Medic is here to guide you through the process of bidding farewell to those ugly popcorn ceilings once and for all. In this blog we’ll discuss a few popcorn ceiling removal techniques to help make your home feel modern and bright.
3 Common Reasons For The Removal Of Popcorn Ceilings
Let’s face it – popcorn ceilings are so last century. Seriously, aside from their outdated appearance and the aged-yellow blemishing that lurks overhead, there are several compelling reasons why you might want to bid adieu to your popcorn ceilings:
1. Aesthetic Eyesores: Popcorn ceilings can make your home feel dated and dingy, detracting from its overall appeal. They trap light and make your paint colors look dull.
2. Difficult to Clean: If your popcorn ceilings are not painted, dust, dirt, and cobwebs can easily cling to those textured surfaces, making popcorn ceilings a nightmare to clean. And when you do try to clean the unpainted popcorn ceilings, you can damage the texture which draw even MORE attention to them.
3.Allergen Traps: The nooks and crannies of popcorn ceilings are perfect breeding grounds for allergens like dust mites and mold, potentially exacerbating respiratory issues. Gross!
Health Risks Associated with Popcorn Ceilings
Speaking of health hazards, did you know that popcorn ceilings could pose serious risks to your well-being? Some textured surfaces may contain asbestos, a harmful substance commonly used in building materials before its ban in the late 1970s. Disturbing asbestos-containing materials during popcorn ceiling removal can release hazardous fibers into the air, putting you and your loved ones at risk of asbestos-related illnesses.
Before you try to remove or perform popcorn ceiling repair on your ceiling texture, it’s best to call Drywall Medic and have our team perform an asbestos test – to make sure you and your family is safe from the harmful and toxic effects of this common substance.
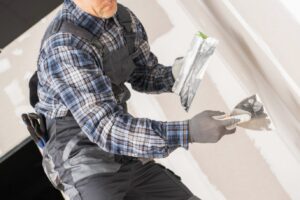
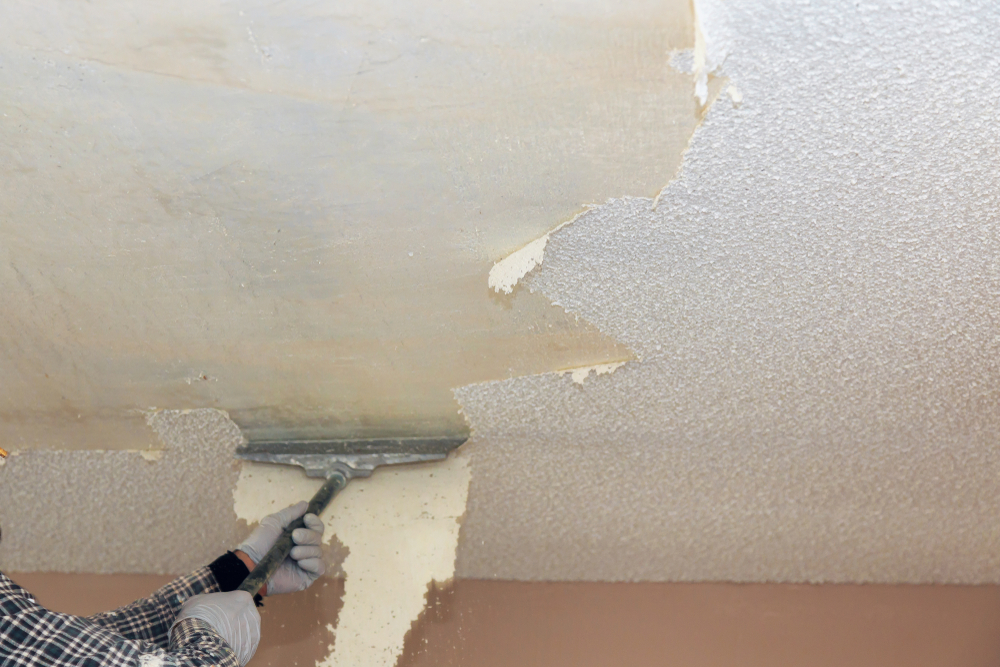
Step-by-Step Guide to Popcorn Ceiling Removal
Now, let’s get down to the nitty-gritty – how to banish those popcorn ceilings from your home once and for all. Here’s a few tips we employ at Drywall Medic Victoria to win back your family and friends, and make them want to come to your home for the party:
- Preparation is Key: Before diving headfirst into popcorn ceiling removal, prep your space by covering furniture, floors, and walls with protective materials to minimize mess and damage. It’s messy, so if you don’t want to be vacuuming dust for the next 12 months, this step is critical.
- Moisture is Your Friend: Sometimes using a spray bottle with water can help. Dampen small sections of the ceiling to soften the texture, wait a while and then scrape it away with a putty knife – it can make it easier to scrape away.
- Scrape Away: Armed with a 6 inch putty knife or popcorn ceiling scraper, gently scrape off the softened texture, being careful not to damage the underlying drywall. If you’re strong and have the stamina, try catching the popcorn texture in a tray – it helps content the mess.
- Smooth Things Over: Once you’ve removed the popcorn texture, smooth out any imperfections with joint compound and sand the surface to create a seamless finish. This is generally where the pro’s at Drywall Medic save the day – making your ceilings look amazing!
- Prime and Paint: Apply a coat of drywall primer followed by your desired flat ceiling paint color to complete the transformation and give your ceiling a fresh, modern look.
Step-by-Step Guide to Popcorn Ceiling Removal
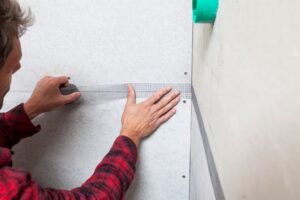
With your popcorn ceilings banished to the annals of history, it’s time to explore modern ceiling finishing options that will elevate your home’s aesthetic. Here’s 3 common options you can employ once the popcorn ceiling removal is done:
- Smooth Finish: Opt for a sleek, smooth ceiling finish for a contemporary look that exudes sophistication and elegance. This is the most common request Drywall Medic receives from home and strata owners in Victoria. It simply modernizes your home in dramatic ways.
- Tray Ceilings: Add dimension and visual interest to your space with tray ceilings, which feature recessed areas that can be painted or adorned with decorative molding. While this may cost a bit more, this would be the time to create this effect. It looks great in living rooms and family rooms.
- Wood Paneling: Sometimes wood paneling works. Being on the west coast of Vancouver Island, you can embrace the warmth and natural beauty of wood by installing wood paneling on your ceiling, creating a cozy and inviting atmosphere.
Ready to remove your popcorn ceiling texture throughout your new home? Say goodbye to those unsightly popcorn ceilings and hello to a home that’s as beautiful on the inside as it is on the outside. Not only will your health improve, but your friends and family will regain their trust in you and want to partake in your weekend get-together.
Ready to kick your popcorn ceiling woes to the curb? Contact Drywall Medic today for professional popcorn ceiling removal services in Victoria, Saanich, Langford, and the other municipalities from Sooke to Duncan.
We also serve Vancouver, Surrey and the lower mainland.