Installing drywall is not an easy task, however, for any homeowner or DIY enthusiast who’s savvy with saving money and wants to repair or renovate their space, this part of your renovation is important. While you might custom embroider your own jacket, or manicure your own landscape, when it comes to upgrading a space, restoring damaged walls, or finishing your Langford basement suite, having the right drywall installed can save you money and effort.
Drywall Medic is Victoria’s premier drywall installation company and in this blog post we will walk you through every stage of the drywall installation process, from setup to final touches.
1. Understanding Drywall:
Often referred to as plasterboard or gypsum board, drywall is a common building material used for interior ceilings and walls. It consists of a gypsum core sandwiched between layers of paper. Make sure you get the appropriate type of drywall for your project as it comes in a variety of sizes and thicknesses.
Some types of drywall for your home are specifically designed for moisture resistance, making them ideal for areas like bathrooms and kitchens. Others are fire-resistant, providing added safety in spaces such as garages or near fireplaces. Choosing the right type ensures durability, functionality, and long-term satisfaction with your project.
2. Gathering Materials and Tools:
Before you begin, gather all the necessary materials and tools:
- Drywall sheets
- Drywall screws
- Joint compound (mud)
- Drywall tape
- Sandpaper
- T-square or straightedge
- Utility knife
- Screw gun or drill
- Drywall saw or rotary tool (for cutting)
- Drywall lift (optional but recommended for ceiling installation)
*Remember to bring your “can-do” attitude and patience. If you’re not familiar with installing drywall, it will test your patience.
3. Preparation:
Measure the area where you will be installing drywall and purchase enough sheets to cover it. Remove any obstructions from the area and cover the floors with plastic sheeting or drop cloths for protection. Using a stud finder, locate and mark the studs on the walls or ceiling.
4. Cutting and Fitting Drywall:
Make sure the drywall sheets fit tightly against the walls or ceiling by measuring and marking their dimensions. You do not want large gaps in between the sheets of drywall. After guiding your cuts with a T-square or straightedge, score the drywall using a utility knife. Using a drywall saw or rotary tool, finish the cut for any complex shapes or corners after snapping the drywall along the scored line.
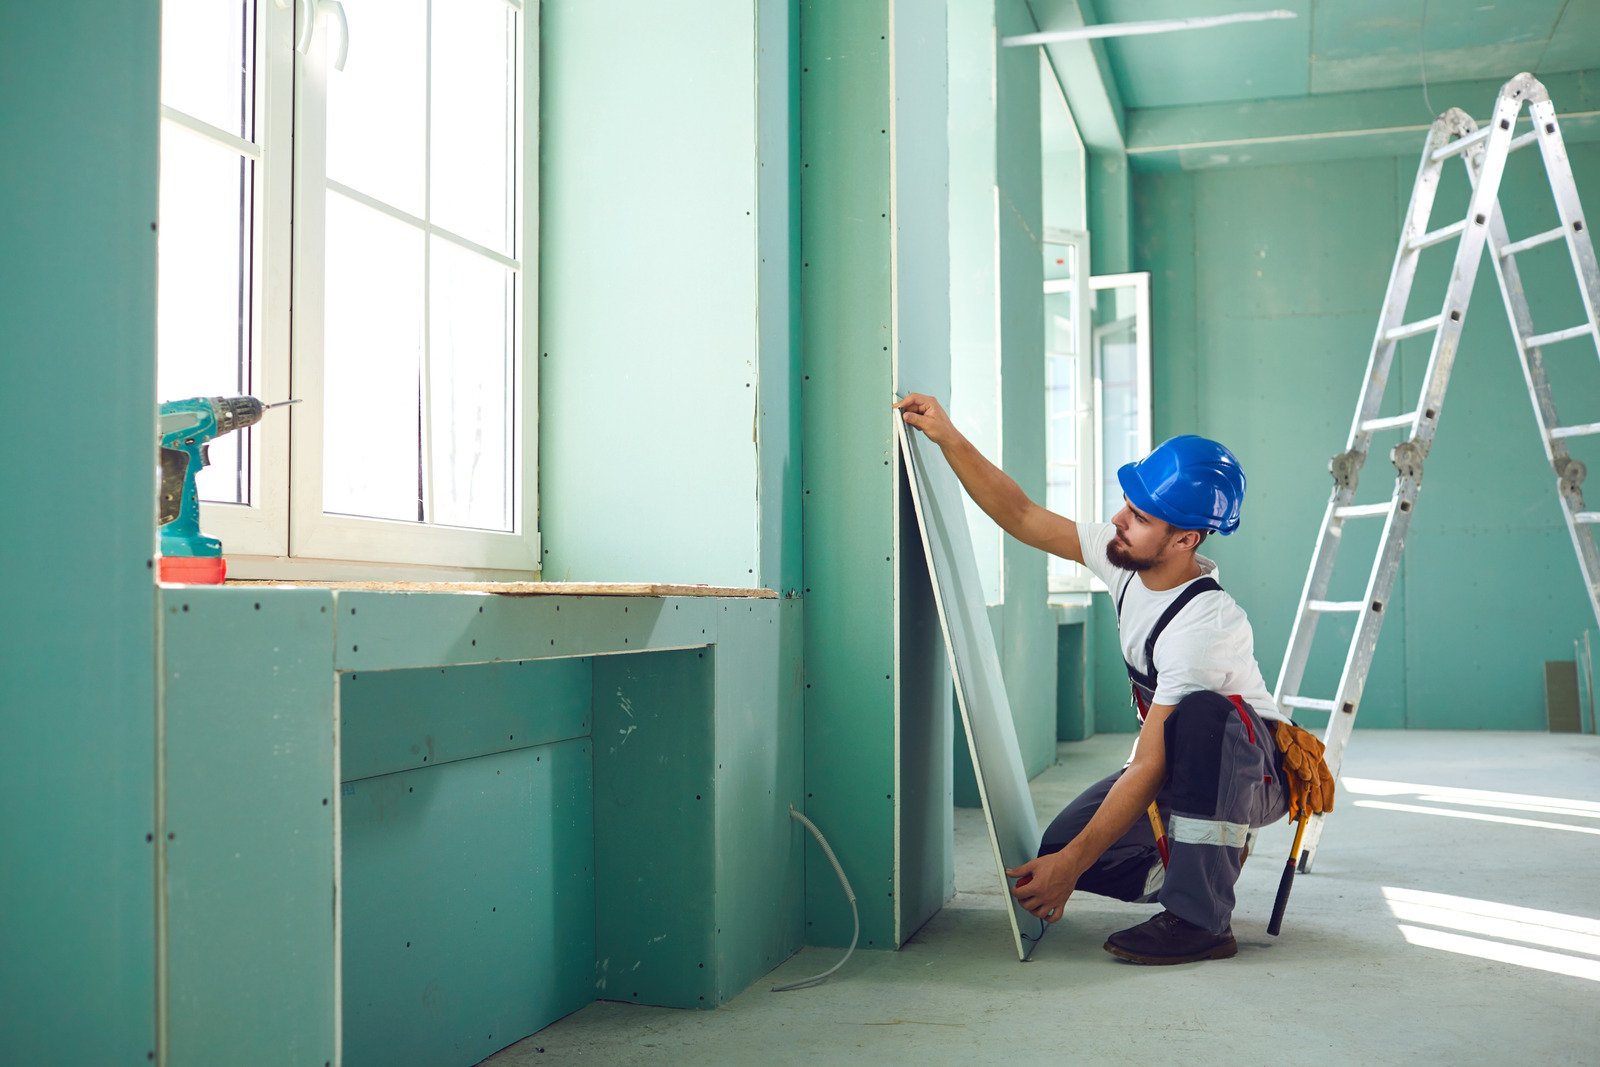
5. Installing Drywall:
If necessary, begin by hanging the drywall on the ceiling. (It should be mentioned that hanging drywall on the ceiling is extremely difficult, and if you have any back or shoulder issues – we recommend you hire a pro at Drywall Medic.) As you screw the sheets into the ceiling joists, use a drywall lift to keep them in position. In order to secure the drywall to the studs in walls, start at one corner and work your way across the room, placing drywall screws every 6 to 8 inches along the edges and every 12 inches in the field. Make sure to allow for expansion and contraction by leaving a tiny space (about 1/8 inch) between the sheets.
Once all the drywall is secured, check for any improperly driven screws and adjust them as needed to ensure a smooth, flush surface. Properly taping and finishing the seams will make all the difference in achieving a professional look. With the right tools, preparation, and attention to detail, you can hang drywall like a pro and create a solid foundation for your walls and ceilings.
Once the drywall is hung, take the time to inspect your work and ensure all seams are properly aligned and screws are countersunk slightly below the surface without breaking the paper. Knowing how to hang drywall correctly can save you time and prevent common issues like cracking or uneven surfaces when it’s time to apply joint compound. With patience and persistence, your drywall project can achieve a flawless, professional finish that will stand the test of time.
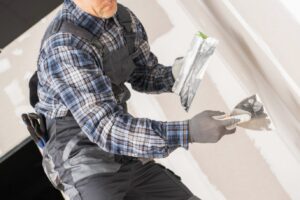
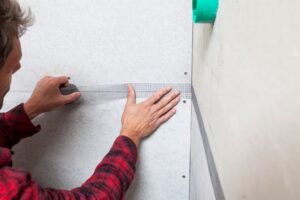
6. Taping and Mudding:
Once you’re done hanging the drywall, it is time to tape the seams. Using a drywall putty knife, lightly apply joint compound along the seams. After covering the wet compound with drywall tape, smooth down any creases or air bubbles. (Note – it’s very important to eliminate all bubbles and air gaps under the tape, otherwise you will have to retape the drywall when the mud dries).
Once the tape is firmly in place, apply a second layer of joint compound over the tape, feathering out the edges to create a smooth surface. Allow this to dry completely before sanding it down to ensure a seamless finish. Additionally, take this opportunity to patch small holes in drywall using a bit of joint compound and a putty knife to maintain a uniform appearance across the surface.
Over the tape, apply a thin second coat of joint compound, being sure to feather the edges so they fit in with the nearby drywall. Let the compound fully dry before smoothing the seams with sandpaper.
7. Sanding and Finishing:
Using a 150 grit sandpaper, sand carefully and pay close attention to the details are necessary to achieve a smooth, even surface. After the joint compound has dried, smooth out any uneven areas or extra compound with fine-grit sandpaper until the seams are smooth and match the surrounding drywall.
When sanding, make sure you wear a respirator or dust mask to prevent dust particles from entering your lungs. It’s not fun cleaning out your nose full of drywall dust. Before adding the final touches, make sure the walls are totally dry by wiping any remaining dust with a damp cloth or sponge.
8. Priming and Painting:
After sanding and cleaning, it is time to prime and paint the drywall to achieve a smooth, professional look. Apply a coat of PVA or drywall primer to the drywall surface using a brush and roller, ensuring full coverage and even application. If it’s a large renovation, you can spray the primer with an HPLV sprayer, but make sure you backroll the primer to ensure even coverage.
Once the primer is dry, apply your chosen paint color using long, smooth strokes, working from top to bottom for optimal coverage and consistency. Allow the first coat of paint to dry completely before applying additional coats as needed for the desired finish. Be sure to follow the manufacturer’s recommendations for drying times between coats.
9. Cleanup and Final Touches:
With the painting complete, it is time to put the finishing touches on your drywall installation project. Clean up any debris or leftover materials from the installation process, including dust, scraps, and packaging. With the painting complete, it is time to put the finishing touches on your drywall installation project. Clean up any debris or leftover materials from the installation process, including dust, scraps, and packaging. Take a moment to inspect the walls and ensure everything appears smooth and flawless, showcasing the effort you put into following the drywall finishing stepbystep process. Adding final details like outlet covers and trim will help complete the transformation, leaving your space looking polished and professional.
Remove any protective coverings from floors, furniture, or fixtures, and return the space to its original condition. Inspect the finished drywall surface for any imperfections or touch-ups needed, and address them accordingly with additional joint compound, sanding, and painting as needed.
Finishing
Installing drywall is no doubt a daunting task, but with the right tools and techniques, it is a manageable DIY project that can greatly improve the look and feel of your home. To get started, it’s important to properly measure and cut the drywall to ensure a seamless fit, reducing the need for excessive joint compound.
Once the drywall is in place, you can explore different drywall texture options to add character and personalize your space. From smooth finishes to unique patterns like knockdown or orange peel, these textures can elevate the visual appeal of your walls and ceilings. To make the process smoother, be sure to measure and cut your drywall panels accurately, ensuring a snug fit for a professional finish. Once installed, consider exploring cool drywall ideas for homes, such as incorporating built-in niches, textured finishes, or even decorative panels to add a unique touch to your spaces. With a bit of planning and creativity, drywall can serve as the perfect canvas for transforming your interiors. Finally, learning how to finish drywall properly is essential for achieving a polished and professional look.
This involves taping the seams, applying joint compound evenly, and sanding the surface until it’s smooth and ready for paint or texture. With attention to detail and patience, you can create a flawless finish that enhances the overall aesthetic of your home. Don’t forget that patience and attention to detail are key throughout the process, especially when taping and mudding the seams for a polished outcome.
If you’re new to the task, following a drywall finishing stepbystep guide can provide valuable insights to achieve smooth, professional-looking results. By investing time in proper preparation and finishing touches, you’ll create a durable and stylish foundation for your home’s interior design projects.
To achieve the best results, take time to research the pros and cons of drywall textures to find the style that aligns with your design vision and maintenance preferences. While textured finishes can add depth and character, they may require more effort to clean or repair compared to smooth surfaces. Ultimately, understanding the trade-offs will help you make an informed decision that balances aesthetics and practicality for your home.
By following this step-by-step guide, you will be able to tackle drywall installation with confidence and achieve professional-looking results. By breaking the process into manageable steps, you can ensure each phase is completed with precision and care. From measuring and cutting to securing the drywall in place, attention to detail is crucial for a flawless finish. With these drywall installation tips, you’ll be equipped to handle common challenges and create a seamless, polished look in any room.
Just keep in mind that drywall installation is no easy task and takes a lot of physical ability. So if you want perfect professional drywall finish for your home in Victoria, BC call the experts at Drywall Medic. Contact details for Drywall Medic is as following. Drywall Medic not only specializes in flawless drywall installation but also ensures the job is completed efficiently and to the highest standard. Whether you’re renovating your space or tackling a repair, their team can provide expert guidance tailored to your needs. For more home improvement ideas and tips, don’t hesitate to reach out and see how they can transform your vision into reality.
- Victoria, BC: #136 – 2936 Amy Rd, Victoria, BC, V9B 0B2, Contact Number- 250-880-8849,
- Vancouver, BC: 6894 192 St, Surrey, BC V4N 0B7, Contact Number- 604-913-4656